Monday, June 7, 2010

Brownie Cupcake Birthday Cake

For Aurora's 1st birthday I wanted to make a cake. To many of you that probably sounds pretty easy and you would whip out a fabulous cake in seconds.
 I, on the otherhand, have never really made a cake. I figured this was another challenge for my blog.
 I researched some different ideas and I thought these cupcake cakes looked relatively easy. 

Here are couple of my inspirations:

(Although I was pretty sure my cake wouldn't look like this one...)

I'm not a big cake person myself, so I went with a Brownie Cupcake Cake with Cream Cheese frosting.

I used my favorite brownie recipe:
1 1/3 c. flour
3/4 c. oil
1 t. baking powder
2 t. vanilla
1/2 t. salt
3/4 c. baking cocoa
4 eggs
2 c. sugar

Sift flour, baking powder and salt together; add cocoa to dry ingredients and set aside. In separate bowl beat eggs well. Add sugar gradually to eggs. Mix in corn oil; add vanilla. Mix well into dry ingredients. Pour into a greased muffin tin or with liners and bake at 350 for 20 mins.

I borrowed a mini muffin tin from Tammy for the stem and leaves and used my own muffing tin for the flowers.

Of course Martha has her own recipe which I did look at to see if I should change anything about my recipe or directions. What would we ever do without Martha?

I had planned to make my own cream cheese frosting too but then Aurora woke up clingy, grumpy and sick the morning of her party. I wouldn't deserve the title of Domestic Goddess if my baby didn't come first. So I didn't get the chance to make the frosting.  I used store bought cream cheese frosting and with the help of my friends who were at the party tinted it with food coloring and iced the cupcakes right before we ate them. Sometimes we all need just a little help from our friends. (If you listen hard you can hear the Beatles singing quietly in the background).  


Not too bad, eh?
I was pleased with the result.
They looked good, tasted good and they were pretty easy to make, liked I hoped they would be.

I think I may have earned another golden spoon even if technically I cheated a little bit.


Sunday, April 4, 2010

Easter Brunch: Gingerbread Waffles

So I was looking for something fun to serve this past weekend for Easter while my parents were visiting.  I came across this recipe for Gingerbread Waffles here.

I am always looking for the "perfect" waffle recipe.  I like them thick but light & fluffy and of course, to taste delicious but I always end up with good but rather average waffles.

I decided to try the gingerbread recipe out for my quest. 
They were quite yummy and better than average but not quite perfect. 
I think this will be a fun tradition we will start having around the Christmas holidays though.  Maybe Christmas Eve morning we will have gingerbread waffles for breakfast.

So, Jared thinks that it's our waffle iron that is jinxing my search for the perfect waffle.  He says that ours is pretty thin and if we got a fatter one the waffles would turn out more what I'm looking for.  He's probably right, since he usually is. 

Do any of you have a bigger waffle iron and are your waffles big, fat,& thick and yet light & fluffy? Where did you get your waffle iron?

Anyone have the "perfect" waffle recipe?

Monday, March 1, 2010

Copycat Cafe: Parisian Pizza

Another favorite restaurant that I love is Saul Good.

My "birthday-dinner-girls'-night" in June.

One of my absolute favorite items there is the Parisian Pizza. I was planning on trying to copy it but never did.  Then my friend Rozalyn, who is a fabulous cook, made it for girls' night recently.

 I decided it was time to earn another gold spoon and bring Parisian Pizza to a baby shower I was hosting. I called Rozalyn, looked up recipes and planned my course of action. 

The recipe I came up with for 2 pizzas:
2 large Granny Smith Apples
1 Bartlett Pear
2 pkg. Brie cheese
1 pkg. Canadian Bacon
Honey
all on my favorite pizza dough recipe
*
As I was making it I realized, a little too late, that it might not be the best idea to make something you have never tried before and take it to a party...
But it was really quite easy and so delicious!!!!
(Before I put it in the oven for 25 minutes at 375 degrees)
*
This blog is truly motivating me! I know I would of taken something safe and secure if I hadn't wanted to challenge myself so I had something to blog about!  Also, since I knew I would be posting it to the blog I actually did research, slowed down and paid attention to the details.

Wednesday, February 17, 2010

Copycat Cafe: White Hot Chocolate

Since my days have been looking like this lately....


I've been doing a lot of this....
Carrying a lit candle & a book around with me everywhere I go in the house and living off of hot chocolate.
I've been craving my favorite cafe's white hot chocolate. 
So I decided to try to make my own with the leftover white chocolate from the Oreo Balls.
My first inclination was to just wing it but I almost always regret such impulsive behavior. So I looked up recipes and many called for:

Egg
(What does egg do for a drink? I love eggnog but because of all the horror stories of drinking someone's homemade recipe I rather not put egg in my hot chocolate). 

 Cream and Half & Half
(Now I thought half & half was cream.  You know half cream and half milk.  Am I wrong?  Why would you put both in?)

 Vanilla extract and sugar
(That seemed liked overkill since white chocolate is already vanilla flavored and so sweet.)

So the first time I made the white hot chocolate it was waaaaay too sweet and that's saying something coming from the Sugar Queen herself.

The second time I didn't use vanilla or sugar and it was perfect...better than Third St. Cafe even!

Recipe:
1 square of white chocolate melted in the microwave
3/4 mug of milk (I even used Skim) heated in the microwave
Combine and stir well in mug.
A couple of dashes of cinnamon (This is the secret! It wouldn't be anywhere near as good without the cinnamon! I'm glad I saw it one of the recipes and remembered to try it.)

Next time I'm thinking about even going more adventurous and trying it with cayenne pepper or chili pepper!

Sunday, February 7, 2010

Round Two:Oreo Balls

I am so very pleased with them!

The secrets of my success:
Slow down: I made the Oreo Balls one night and dipped them in the chocolate the next day.  I gave them a lot of time in the fridge.

Attention to detail: I used our brand new blender instead of the mixer, which made the dough more fine and less chunky. Last time I wasn't sure if I had used reduced fat Oreos and/or cream cheese.  This time I ensured there was no skimping on the fat! I also melted the chocolate in the microwave (w/o shortening), the heat from using the stove kept softening the oreo balls too much last time.

Patience: I have quite a bit of patience when it comes to children but next to none in the kitchen.  I am easily frustrated which usually leads to rushed, sloppy work.  It took all my calming techniques, that I teach my clients in the therapy room, to finish this project. (Kind of sad or ridiculous, isn't it?)

Thanks for all the help and support!

Since they're for a Super Bowl party I made some of them "footballs."

This is another one of my favorites:
I <3 the Colts!

Even though I'm just a trainee, I still need an assistant...
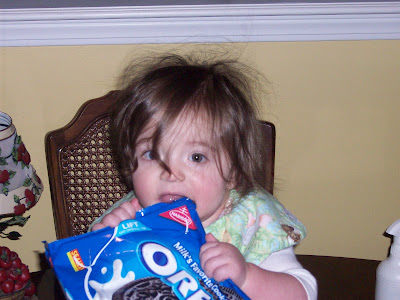
and I'm teaching her early in the way she should go...wherever the Oreos are.

(Have you ever seen such crazy hair?!)

So what does a DGT (domestic goddess in training) earn when she passes a test?

Heros earn medals. Angels earn wings. 
Do DGT's earn golden spoons?
1 spoon down, 15 more to go.  I believe a true DG wouldn't even consider entertaining without two full sets of golden spoons, right?

Tuesday, January 26, 2010

OREO BALLS

I made Oreo Balls this past Christmas.  I got the recipe from my friend Fatimah (who is a goddess) when she brought them to a party. Her Oreo Balls were decadently delicious and pretty to look at too!


Fatimah's looked pretty much like these:
 

She told me the recipe verbally and it sounded super easy!

All you basically need is this:


Ingredients:
- 1 Package Oreo cookies, crushed
- 8 ounces cream cheese, softened
- 1 bag white chocolate chips, melted or 2 packages white dipping chocolate

Directions:
  1. Mix the crushed Oreo cookies and cream cheese together in a bowl. Use a blender or a mixer to speed up this process.
  2. With your hands, roll Oreo and cream cheese mixture into small balls. Place on baking sheet lined with wax paper.
  3. Chill in freezer for 30 minutes.
  4. Melt chocolate chips or dipping chocolate in the microwave until melted.
  5. Using a toothpick, dip the Oreo balls into the melted chocolate. Cover well.
  6. Let Oreo balls harden on a wax-paper lined cookie sheet in fridge or freezer. Takes about 15 minutes.
  7. Keep in fridge! Serve cold and enjoy!
  8. Makes about 25–40 Oreo Balls, depending on how you make them.

My Oreo Balls were not anywhere near as pretty and they didn't taste quite as good either.  


But they apparently tasted good enough to be requested at the Super Bowl party we are attending (Go Colts!).

So here is my chance to make them better. 


How do I get them to taste even better?
Last time I used almond bark dipping chocolate and I didn't melt it in the microwave but used a double boiler.  When the chocolate wasn't as creamy as I wanted it, I added shortening to it as instructed on the chocolate bag.  I think I might of used too much shortening and maybe that influenced the flavor?


How do I get them to look better?
I used toothpicks and rolled them around in the pan to coat them and you see what the result was. Do I need to change the temperature of the chocolate? I should probably shape them better in the beginning, too.


Any suggestions?